Thursday, April 14, 2011

Comic Relief for Spring Break


Recently, it seems web-based comic strip creators are popping up all over the web. There are some really good web tools available and many are FREE!

The instructional benefits of creating comics can help students learn how to convey an idea concisely, tell a story in a logical sequence, and communicate/collaborate with others. While each tool I'm going to list for you offers these learning benefits, each offers a variety of features. Best of all, comic strips have the ability to engage students reading them and creating them.

Here's a list of FREE comic strip generators to help you narrow down your choices.

Pixton for Schools - very customizable, remix option, no email required, teacher rubric & lesson sharing


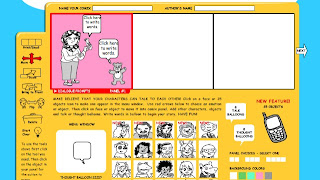
Make Beliefs Comics - easy, quick, somewhat limited options/choices, good for all ages


Marvel Kids - great tweaking ability, lmtd. characters (Marvel characters only), no option to save on site


Strip Generator - basic and simple


Comeeko/PikiStrips - your "pikis"/pictures or their characters, printing options for a fee


ToonDoo - nice balance of user-friendliness and creative options

Read Write Think - canned creator, somewhat elementary

Comic Strip Generator - one frame photos with speech bubble

Comics Lab - Any Garfield fans out there?

And just for fun...Custom Sign Generator

Friday, April 8, 2011

I ♥ These Sites!

I have been searching for FAR too long for a website that would convert videos from the Flip video output format (MP4) to a format that would work in Windows Movie Maker without a fee, without a huge logo being stamped on the video, without frustration with the user interface, without asking me technical questions in language I didn't understand, and that wouldn't crash half-way through the hours it was taking to convert the video. At last I found one; you might have heard me cheer across the county the first time I realized it worked! And I am happy to report it has worked every time I have tested it and as an added bonus ~ you don't have to download the program to your computer!

The website is: www.online-convert.com. It converts other things as well, though I haven't tested the others out. It is very user friendly but I did create a short video in case you want to see (one I also had to convert, lol, to get it to post here). If the video does not work it is likely a temporary blogger issue, not a conversion issue... promise!


So, another site I love is the one I used to create the previous video... http://www.screenr.com/. This site allows you to make a screencast ~ a video of what you are doing on your computer screen. In the classroom, a screencast could be posted to a blog or website and students can get the directions on how to use a computer application on their own desktops and review it at their own pace... no more repeating directions over and over in front of the classroom! This site is free and is internet based... no download of software required! You do need to register to save your video.

Want to use just a clip from an existing video from YouTube in your instructional presentation? This site ~ http://tubechop.com/ ~ allows you to focus on only the part of the video you hope to share... no awkward in front of the class searching for the right part of the video! After you have "chopped" the video the site offers several ways to share the clip (link, embedding, etc.).

One more just for fun: http://www.wikihow.com/Make-the-Heart-Symbol-Using-a-Computer! I have been wondering the trick behind creating a heart (like the one used in this blog title) and today I figured it out! On a laptop hold down FN, Alt, and L at the same time. ♥ If you substitute other letters for the L, you can get other symbols (and annoying beeps if you pick certain letters). ☻☺♣ ♠ Gotta keep up with the kids you know!
Related Posts Plugin for WordPress, Blogger...